Transferring a student between classes is a two-step process: first add them to the new class, then remove them from the old one. Student progress and practice history stays with their account throughout this process.
Before you begin, a few things to know:
-
The student's practice history and progress data stays with their account
-
Assignment completion status is tied to the specific class
-
The student will appear in reports for both classes during the time they were enrolled in each
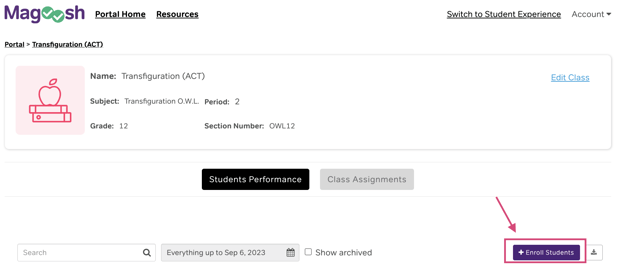
Step 1: Add the student to the new class
-
Go to the Classes tab
-
Click on the class you want to add the student to
-
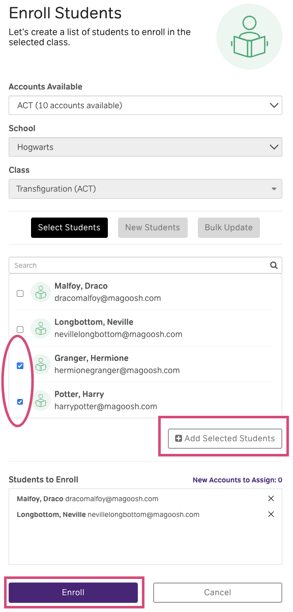
Click Enroll Students
-
Search for the student by name or email
-
Select the student and click Add Selected Students
-
You should be able to now view them in the Students to Enroll box. If you made any mistakes you can remove them by clicking the x next to their name.
-
Once finished, click on Enroll
Step 2: Remove the student from the old class
-
Go back to the Classes tab
-
Click on the class you want to remove the student from
-
Find the student in the roster

-
Click the minus icon (−) in the Actions column
-
Click Unenroll Student to confirm
Transferring multiple students
If you're transferring several students at once, complete Step 1 for all students first, then go back and complete Step 2 for each one.